I got an email the other day in which a reader asked me what tools I thought she needed to have on hand before she started jewelry making. She wanted a list of items she needed that would be used for most of her basic jewelry making needs. I replied, and then I thought, “That’s a great topic for a blog post”.
If it’s helpful to her then maybe YOU will find it helpful too!
And we KNOW how I like to be helpful.
I’m also really good at being a pain in the butt but we’ll stick with the helpful story. OK?
This post contains some affiliate links for your convenience. Click here to read my full disclosure policy.
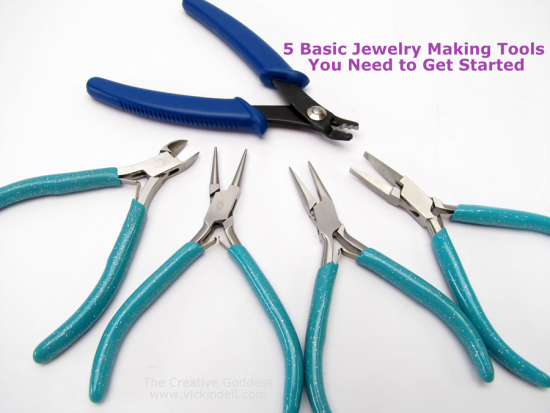
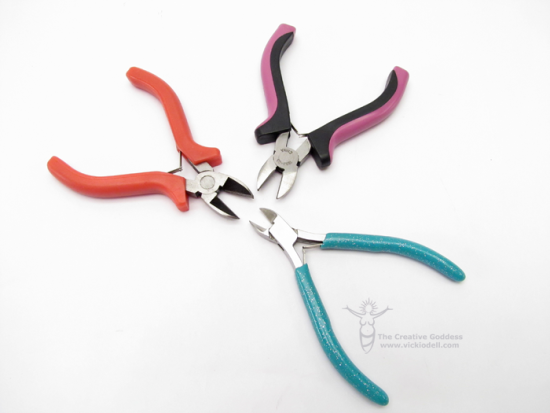
1. Wire Cutters
Wire cutters allow you to cut headpins, eyepins and jewelry stringing wire. Always put the flat side of the cutters closest to the work for a closer cut. Be sure to cover the portion of the wire that will be cut off so that it doesn’t fly across the room. Here are a couple of wire cutter brands I recommend.
Don’t cut memory wire with your wire cutters though as it will put dents in your cutting edges making the wire cutters fairly useless. If you are going to be cutting memory wire I recommend buying memory wire cutters. Yes, there is a tool made specifically for cutting memory wire.
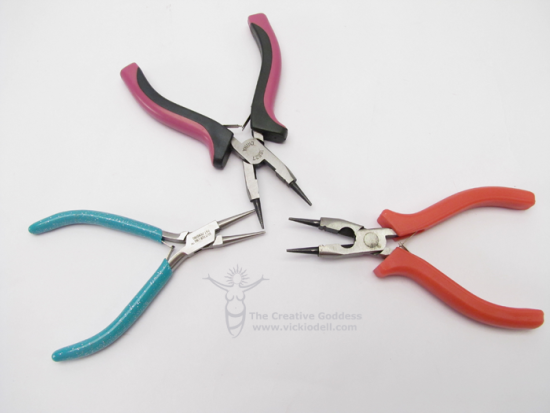
2. Round Nose Pliers
Round nose pliers, as you can see, are rounded and perfect for making simple loops and other rounded wire elements.
The jaws of round nose pliers taper towards the point which allows you to position your wire along the jaw to get the size of loop that you want. For a large loop place your wire near the handles and for a smaller loop place your wire towards the tip of the pliers.
The key to making consistent sized loops it is to mark the pliers with a permanent marker so that you always place your wire in the same place. When you are finished with the project simply wipe the marker away with a bit of alcohol.
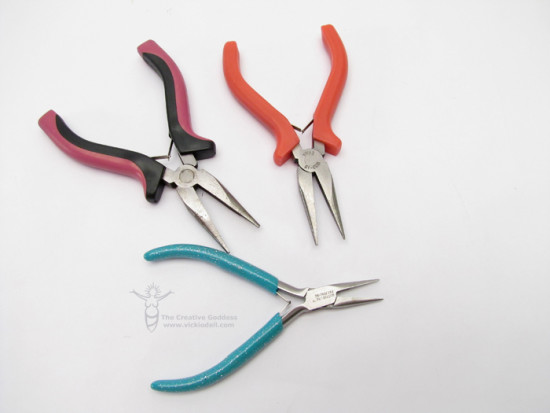
3. Chain Nose Pliers
Chain nose pliers are similar to round nose pliers except that the inside of the jaws are flat. They are better for gripping wire with their flat surface. I recommend chain nose pliers that are smooth on the inside so that they don’t mark your wire like the chain nose pliers with ridges do.
Chain nose pliers are used for opening and closing jump rings or for gripping wire. Like round nose pliers, they taper towards the tip, which makes them useful for getting into small spaces.
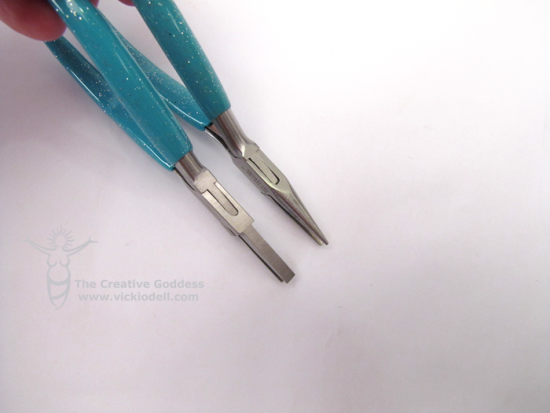
4. Flat Nose Pliers
Flat Nose Pliers are similar to chain nose pliers but the jaws do not taper towards the tip. This wider surface makes it easier to grip jewelry wire.
Flat nose pliers may not be as essential to a basic jewelry making toolbox as chain nose pliers but you WILL need a second pair of flat nose type pliers for holding wire while you shape it. You’ll either need two pair of chain nose pliers OR a pair of chain nose pliers AND a pair of flat nose pliers.

5. Crimp Tool
Also called Crimpers and Crimping Pliers this tool is used used with crimp beads or crimp tubes to secure a clasp on the end of beading wire or to keep beads in position on projects where the wire shows between beaded segments (ie an “illusion” necklace).
The crimp tool has two notches in the jaws. Use the first notch nearest the handles to slightly flatten and round your crimp bead onto the wire. This turns it into a ‘C’ shape (ideally with one piece of wire in each side of the ‘C’). Then use the notch near the end of the pliers to shape this ‘C’ shaped bead into a round.
You may have seen some jewelry makers use flat nose or chain nose pliers to smash the crimp bead or tube flat onto the jewelry wire. This is not a process I teach or recommend and I’m kind of a stickler about it. Smashing the metal creates a sharp edge that is 1) NOT pretty and 2) NOT comfortable on your delicate skin.
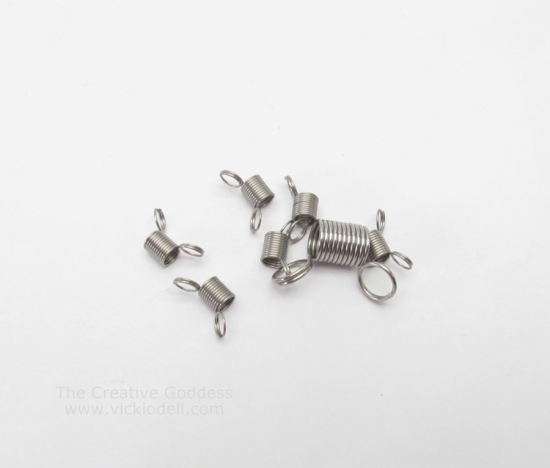
BONUS
If you have it in your budget when you are setting up your basic jewelry making tools, and you plan on stringing beads, I would strongly suggest a few Bead Stops. They are the simplest little gadgets but can save you TONS of time. All you do is squeeze the little loops on either end, spreading the springs apart, then insert your bead wire and release the loops. The bead stop stays on the wire keeping your beads in place.
There is nothing like picking up one end of the project you are working on and having the beads slide right off the other end.
Ask me how I know this.
Beadalon 8-Piece Bead Stopper – 4 lg and 4 small
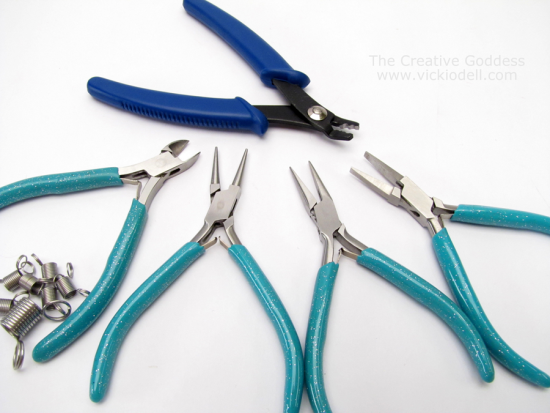
So this is my answer to the question “What Basic Jewelry Making Tools Do I Need to Get Started?”
Plus you got to see pictures.
Pictures make it WAY better. 🙂
What do you think? Did I leave any MUST HAVES off the list? Is there something I listed that you would swap for another item?

HI,
I am from Africa-Uganda working with an NGO dealing with vulnerable children. I have always wanted ideas and tools to guide me on how to get started with jewellery making as a social enterprise to help out raise funds to support children in school. Thank you so much for this eye opener for at least i have got a hint.
Gorreth
I am so much interested, please do update me. Thanks. Rebecca
I saw your friendship lariat necklace on Beads, Baubles and jewels. Where did you get the dyed highlighted beads. I can’t find them thanks
I’m pretty sure I bought them at Michael’s Joyce. I’m not sure if they are still carrying them or not.
PS. My mother’s maiden name is Joyce Riley. 😉
I appreciate the time you took to write this blog for us beginners. I want to be earnest and practical starting my little hobby, but it’s so difficult to know what items to purchase. Kudos to you!
Denise
It is hard to know, Denise. I’m glad you found the post helpful.
It’s so easy to spend your way into oblivion with hobbies like this. Ya know? 🙂
thank you. greatly appreciated 🙂
THANK YOU!!!
Great list Vicki! Stumbled upon your blog as I am about to start my jewelry making venture real soon and I am so excited 🙂
Thanks again! Hope to get more great tips from your upcoming posts!
I so appreciate this list, I was actually going to ask you the same thing.
I so want to try jewelry making.
Your the best sweetie
Yay! I’m glad you found this useful, Dawn. 🙂
Such a great list! Whenever I try a new craft, I want to know EXACTLY what I’ll need to have on hand when I get started so I don’t have to stop in the middle of a project and head back to the store. Since there are so many tools available for jewelry, it’s so nice to get a reality check from someone who definitely knows what she’s talking about!
Thanks Haley!
I know, right? Nothing like starting in on a project only to find that the person who wrote the instructions assumed you had all of the basic tools on hand. If you’ve never tried to project before how would you know?
Hmmm…now I’m thinking I may have to go back and revamp some of my own posts. Dang! 🙂
Vicki
Great list! Can I add one more “Must have?” I think an old placemat- preferable one of those non-skid cushiony ones- is really important to have. It’ll keep your beads from rolling around on your table, you can roll it up like a funnel to pour your beads back into a container, and is a nice cushy place to rest your wrists while you work.
Thanks for the info! : )
Hey there Jenny!
I think I would add your suggestion to a “5 jewelry making tools you probably already have on hand” post. Thanks for the idea for a whole new post! LOL! 🙂
Vicki
Thank you, your answer was very helpful
I’m glad Jaquanda. 🙂